Painting a vintage caravan

Daisy is a 1969 Bluebird Caravan, we got from the left photo to now!
When we brought our caravan home, she was looking pretty sorry for her self:

The plan was just to get her safe and usable, in just 8wks! So lots of things where left off the list, things which could wait till after the main season! She looked like a a depressed shed!Are all caravan white boxes? Well, most modern caravans are. There is a common misconception that they have always been white boxes. Looking back a lot of photos are black and white, so don't really show off that often they where painted to match their tow car!


While looking into colours of the 1960's I found this. (http://retrorenovation.com/2014/03/18/18-colors-1960s-st-charles-steel-kitchen-cabinets/)
Lots of wonderful colours, can you imagination how amazing their kitchens where!!
Lots of wonderful colours, can you imagination how amazing their kitchens where!!

I also thought about turning her into a hippy bus! I would love to paint just her outside door panel like this! I think it would be very easy to make it look like a mess and not as amazing as the images above....

You can find this amazing ap from Dulux, in the ap store - I love it!! A great way to work out what colour we want to do!


As you can see..........we found it really hard to pick............


There are just so many different combinations!!

So as you can imagine......we asked everyone what they thought.....in fact, am still not 100% sure until I order the paint!!
After lots of advice and help from the Retro Caravan Club we made up our minds what product we want to use on her. Her current body work is a wreck! It looks like she has had the wrong paint used at some point, so parts are flaking, some has gone back to metal, and in other places what looks like her original paint! Its a real mess!
So lets talk tools
When it comes to re-painting Daisy, its not an easy quick job. If she had been resealed better at the start of last year, I wouldn't have to un-do and re-do a lot of that work. But hey ho, we didn't have the time but now we do! Yay.
Tools, click here to see my top tools for renovating your vintage caravan! The main tool for this huge job is a random orbit sander, this is to remove the old paint, back to a flat finish. Daisy has quite a few holes, dents, and damage. So before we can paint we will need to fill these holes. (I used a car filler P38.) There is a lot of work, from sanding, re-sealing, fixing and filling! Before we have even got to the painting. Its scary and exciting.
The paint
After lots of research and advice, we have gone with these: Rustoleum
Primer - Rust-Oleum 3302 Combi Primer Adhesion I ordered it from Rawlins, click here for the link.
Paint -Rust-Oleum CombiColor Click here for the link to Rawlins where I brought the paint.
'Rust-Oleum CombiColor is a primer and a topcoat in one that provides protection for years, in minutes. A high quality, one coat maintenance system for metal that can even be applied directly to rust!'
'Rust-Oleum CombiColor is a primer and a topcoat in one that provides protection for years, in minutes. A high quality, one coat maintenance system for metal that can even be applied directly to rust!'
Am very excited about ordering paint, so will update this blog as soon as its here!
This paint is very easy to work with, the primer is easy to paint on to thick. Use a sponge to put on over a roller as it drys very quickly and can leave thick patches.
The sun has been out (at last) today, so I started on the sanding...

Working outdoors, means I have to wait until I have sanded most of her, before taking off her awning rails. Its going to be quite hard to sand around all the window moldings and am going to have to do those by hand. I've been reminded how hard it is to work on Daisy around mini people. I cant just work straight through the weekend, or my husband and I work on her together. It wont be long till it will be much easier to do projects like this with the mini people's help. The boys are pretty good, at coming and going from the house, while we work on her. Checking in, helping, playing but our little girl, is much younger and much more busy.....So progress is slow......

All ready I can see a huge difference! Its quite quick too, I've sanded two sides so far......I need to remove all the awning rail and some of the trim. The problem is I live in the UK...... In one week, we have had sunshine, hail, fog, rain. Its gone from freezing to baking, to cold... So am trying to work around this, by sanding down as much as possible before removing the rail. That way I only have to then sand the rail... Fingers crossed.

Loving this sander by the way. Its not overly big, and doesn't vibrate my arm off!
I will be updating this blog in real time....So check back for my babies next nap, maybe I can get the next to sides sanded........Mmmmm am quite short, I wonder how I will get up on the roof.....
I will be updating this blog in real time....So check back for my babies next nap, maybe I can get the next to sides sanded........Mmmmm am quite short, I wonder how I will get up on the roof.....
What did you get for Mothers Day? Well I had one of the best yet I think!!

I got to spend the morning, drinking a warm coffee, chilling with my mini's, watching hubby work hard on the van! We had very different plans for the afternoon, but a poorly baby who just wanted cuddles changed our plans. So we had a lovely lunch in Daisy and hubby sanded! It was a perfect day! The mini's helped me put lots of things back into Daisy, as I've pretty much finished the inside painting. Only a little painting to do on the shelf and in cupboards, but its so great to use her again. When she was full of paint brushes, paint tins, tools and mess (lots of bits of wall paper.) It wasn't a safe place for the minis to play while I sanded. Now with her beds back in, and the sun out, we have been reminded just how much we are missing being away!
That's one of the many great things about having Daisy at home with us, she is an extra room. The mini's love to go and do some drawing, or read a book etc in her. And in the sunny spot, making sandwiches, or having a coffee brake, it feels like a little mini brake. We all relax so much in Daisy, this tiny, 14.5 foot of space and its like a weight has been lifted!

So how is sanding going, I hear you ask? Well, am not a fan, and if you hear of me buying/getting another van which needs sanding......remind me, that its way harder and taking forever!! I know, I know, it will be worth it, and all this time and work will pay off.....but by heck, if I find more missing trim, wholes, dents, and layers and layers of cracked, scratched horrible *will not sand off* paint, I may throw my toys out of my pram.....There have been two club rallies while we have been busy sanding.......Looking at all the photos going up on Facebook has been quite disheartening and every day our little ones ask when we are going away in Daisy!!
I've been told, it takes about 3-4, 8hr days to sand a van Daisy's size. It feels like forever, I mean I've spent hours on the same section. At first, I was like, this is easy, check me out and pretty much sanded the whole van in a day. But then I went in for a closer look, and no, many, many more hours are needed.

Make hay while the sun shines and all that, but am feeling quite stressed about this job. If its too hot, the paint will set very quickly and could be very hard to get a good finish. We have limited time, to get out and give her a good block of time to do this sanding. Also, my word, how much sand paper is this going to cost us!! I think a lot of this stress is coming from worrying about the awning rail. Just getting it off is going to be horrible, many, many screws have lost their heads, many have rusted away.....Then once we get it off, we need to re-pair all those holes, and quickly sand it all, clean and sand the rail and then prime, then paint.....then get the blinking rail back on.....Oh my goodness, am panicking! Lots of her trim has gone, a few screws in the rail have nothing to screw into, due to damage.....remind me why I got into this again.....
But then, I watch the mini's sat up drawing, like in the photo above and remind my self. Daisy is freedom for us, she gets us out to places we would never have gone and I've never been as relaxed as I am when am away in Daisy. So I keep saying to my self, its going to be ok, we will get the rail off and we will get it sealed ok.
As Disney says 'keep moving forward!'
Down on the south coast, its been a beautiful few days of amazing sunshine!
As Disney says 'keep moving forward!'
Down on the south coast, its been a beautiful few days of amazing sunshine!

So back on with the huge task of sanding Daisy. Working around our minis is hard work, hubby had some stuff to catch up on in doors. So I sanded while he kept the kids busy....

I stopped for a lovely lunch brake with all the minis in the garden while they made the most of the sunshine!

With a mug full of coffee (this mug has been with me in photos since the very start of doing up our Daisy!) I got back to work!

It was hard, hot work in the beating sunshine. Such a glorious day, which should have been spent at the beach, not sanding down a 1960's van. But I must not complain as this time last year, working on the van was freezing, wet and horrible..... Am getting very, very bored of sanding.......very.....
The longer am sanding, and the warmer the days are getting....the more am panicking about if the paint will work in this heat!! (and the awning rail....lets not forget that scary task coming of removing and resealing the awning rail...)

Just a few panels on this side left, then lots and lots of hand sanding.....
Keeping following us and our Daisy! Very soon, I hope, she will look a lot different.
Keeping following us and our Daisy! Very soon, I hope, she will look a lot different.
The Rail: Last weekend we worked on the awning rail.....The scary job, I have not been looking forward too!

Grandpa to the rescue!! I got most of the rusted horrible screws out (many missing and some, screwing into nothing...) But there where a few, which looked like they had melted away, I got stuck with.

Grandpa, is amazing! Experience/correct tools and with the help of Hubby, they got them off/out!! So the awning rail was off, it was covered in paint, sealant, and so much dirt!!

It took all three of us at one point to get that rail off!
Here is my little 'how to' video, part one of Daisy's awning rail.

I spent all weekend, scrubbing the awning rail.
The awning rail part two.
Even sneaking down stairs, after the minis had gone to bed to sit in the garage and scrub!Its much easier to scrub and clean the rail, off the caravan. Its been hard but its made such a huge difference - it will help them to seal when they are back on the van and look so much better too!

Next job was to clean up, under where the rail came off, and do any last sanding.

Then to clean up all the trim I wasn't removing. This window was covered in about 3 different sealants, the screws are rusty too, so am going to add replacing them to my *very* long list to do! The metal has come up so well, and with a wire brush and some hard work its looking so shinny and fab! (Note my new sign for the back of the van too.)

While am painting Daisy, I need to finish her chassis. Its currently cream, which I love and looks fab. She needs another rub down and re-paint. I had used hammerite, but at 18.99 a tin........It wasn't in my budget. I have heard great things about the Aldi metal paint, so thought, at the price I would give it ago! They only had white or silver in stock, so white it is!
I will let you know how I get on and what I think of it! Tomorrow is paint day!! (First thing in the morning will be spent filling holes and then PAINTING!!!) Am so excited!! Will it be too hot, will the paint work, will I be able to reach, will it look ok!! Will I get all the holes filled and lights working.......Will we get the awning rail back on.........
Check back to find out!!
Filling Holes/Dents
So I had two days to paint Daisy, and almost finished all the prep jobs. Woke up on Sunday, knowing I just had to fill a few holes, and then paint......So first was filling holes.

Enter car filler P38! I have always loved filling holes when prepping to paint. This stuff.....its not all that much fun....but very usable and easy to follow the instructions. I was using it today, thinking about how this was one of the very first things I brought for Daisy and am only just using it now, a year and a bit after buying it!!

Make sure you wear gloves for this job!!

There are a lot of dents and holes in Daisy! Its easy to over add and end up having to scrap/sand more off, so build it up, letting each layer dry first.

This is one of the deepest dents, its a big dent, its in an odd place too. No one of these dents where made by us, I should add! I think it needs another layer of filler.....Well, I had almost finished this job and started to sand it smooth.....when...
RAIN
Ok, so I know I live in the UK and its rains.....but really!! My painting day, after weeks of warm beautiful days, it pours with rain about half an hour before I was about to pick up a brush!!! Boo flipping who, I was not a happy bunny about this!!
Well, this is Britain and all that, time to make the most of it! What job could I do in the rain? Working around minis has been start work, so this down pour, called time, lunch time! After lunch, the rain had lighten, so I pretty much thought 'screw you rain!' Grabbed a tin of my new metal paint for the chassis, and got under the van. Under the van, around the legs, was not all that wet. So I got painting! **I will do some painting, I thought!**

The white is so different!! Its soooo bright!! Looks really smart!

I like it! I need to let it dry, then move the legs and paint any missed bits! (You can see one of the bigger dents in this photo too!)
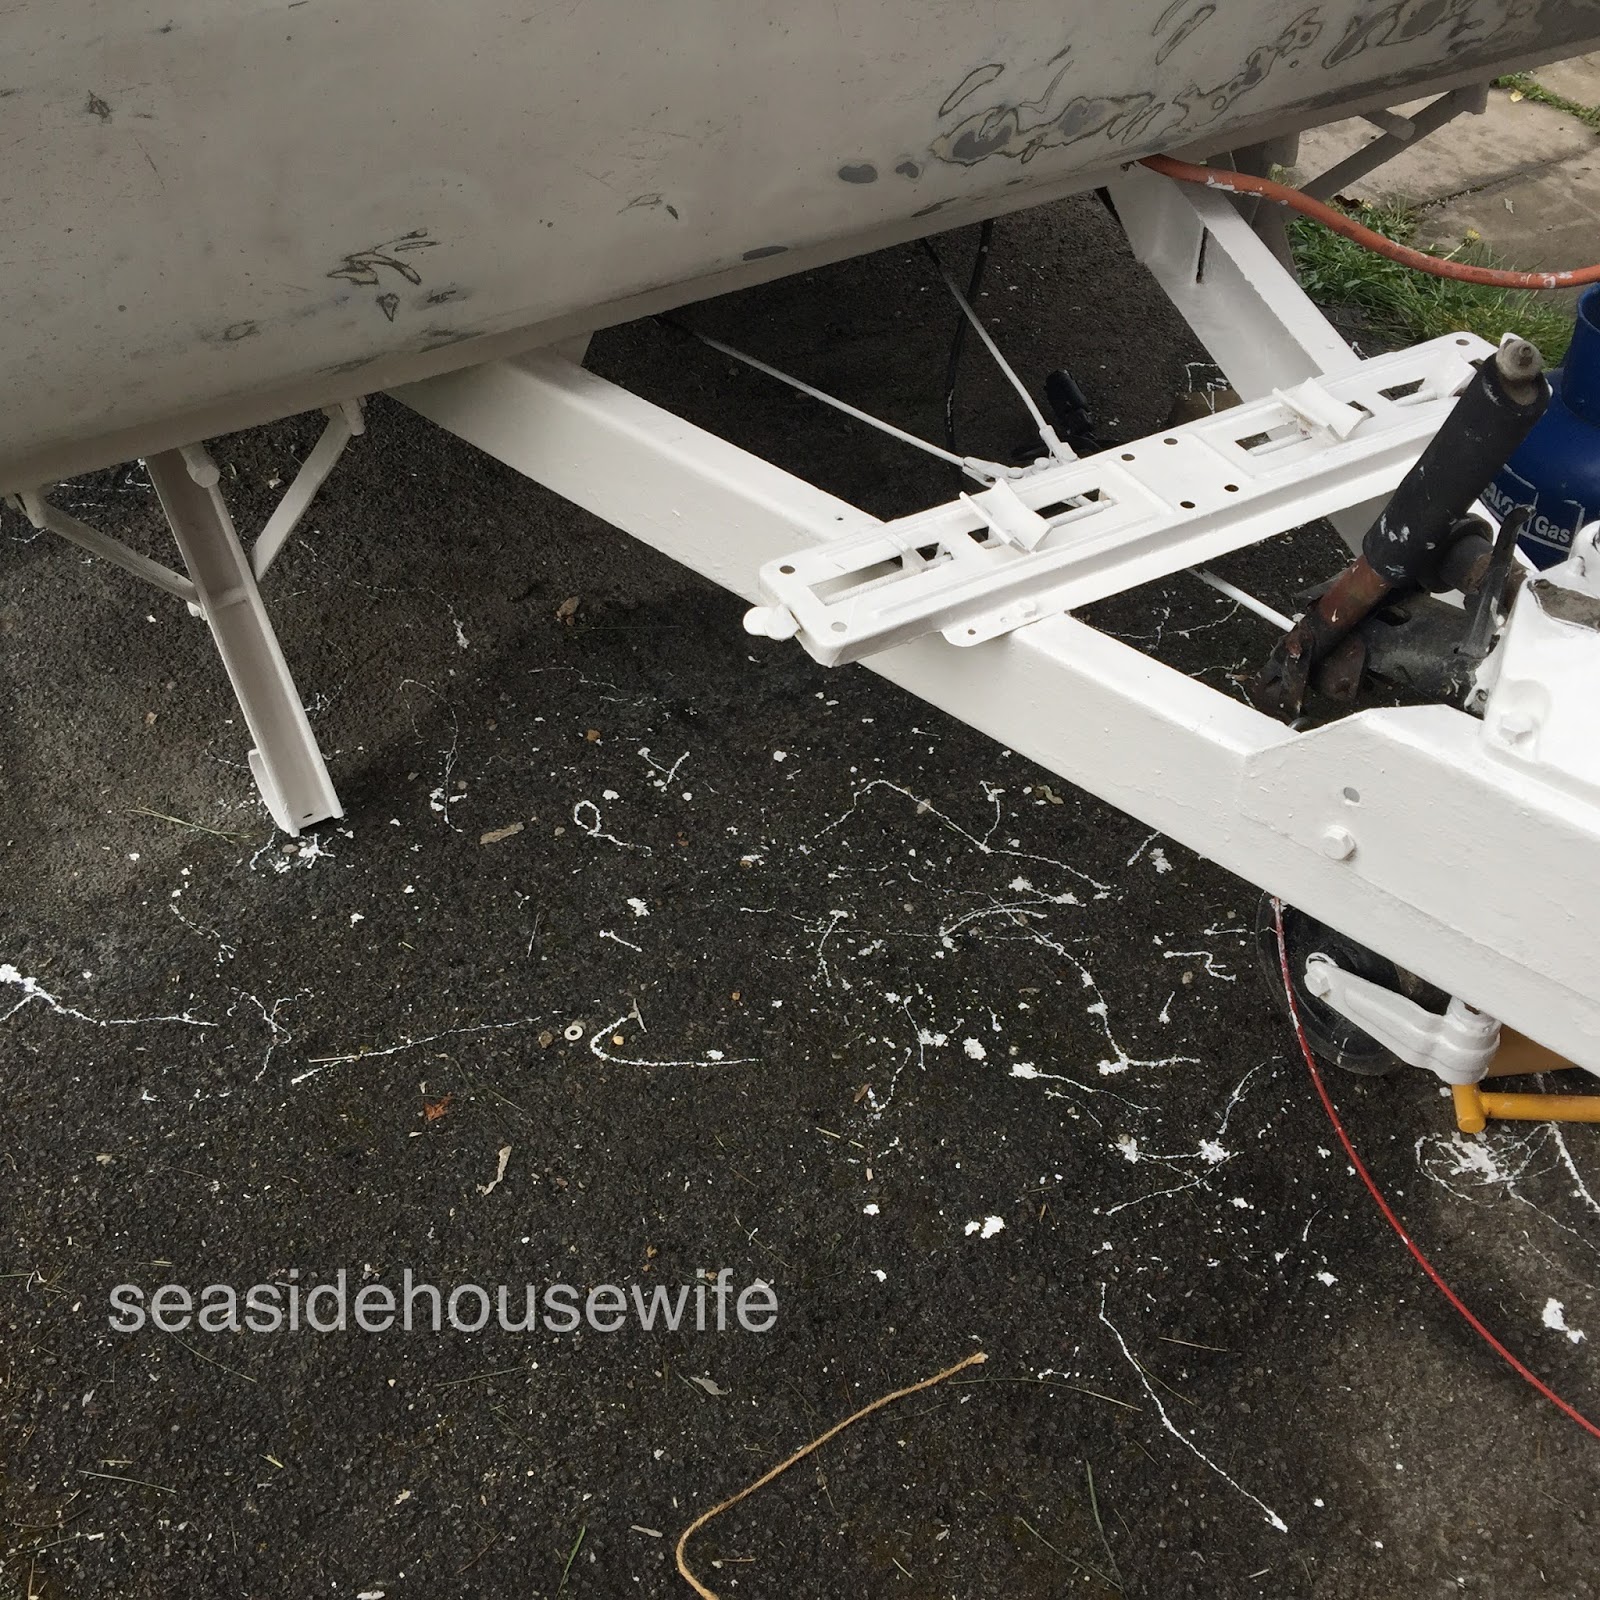
I really liked re-painting the chassis today. It was a job I needed to come back to anyway. I had done such a huge rush of it last year, and it wasn't finished. (Just the bits which show where painted.) So the plan was to paint the showing parts cream, and the underneath black. I still haven't brought any black paint.....So I will have to make up my mind as to if to find some cheap black metal paint or paint it all white..WOW, going from cream, to white, was a big shock! I think I really quite like it! I didn't think I would, I love cream, but I now see what my friend said - it looks clean and new - It does! Clean, fresh and new! So what did I think of the cheap Aldi paint, well my friend was right again! I love it!! Easy to use, as not too thick but paints on great, I dont feel like I have to do lots of layers! We will see how it holds up!
What will tomorrow bring? PLEASE not rain!!
Rain, rain, rain and more blinking rain. Oh and wind! The thing is, a little rain would mark the paint, so I just couldn't risk it!!
Cut to the next weekend.....Well it didn't start well, with the car not starting.....She was off for her service, well....Am still waiting to hear back....THINK POSITIVE!! With hubby, rushing about trying to sort the car, I couldn't start painting (not the sort of job you can just stop mid-way through.) So I got on with another job on the big list for Daisy!Wood and match-sticking the holes in the awning rail!

First in the week I had syringed in wood harder/protector into each hole. Leaving that for a few days to dry fully, I then pushed in wood glue and then a match-stick into each hole in the awning rail. When they where as in as far as they where going to go, I snapped off the heads. (This is a fab top tip from a member of the Retro Caravan Club.) This means when we are screwing the awning rail back into place, it will have something to screw into!! I've done this now, to give it lots of time to harder/dry before the rail goes back on.
So keep your fingers crossed we will still have a car and that I get to paint today!!
Half way through and about to start painting!!
Half way through and about to start painting!!
WOW

I love this paint! The primer is crazy and stressful but worth it - The primer is so odd, its like a thin glue, not paint. You have to get the paint on within 30-45 mins so its still sticky. It was a hot sun afternoon, here in May. So I was worried as its easy to just keep painting and then I panicked thinking how am I going to paint all of the primer within 30 mins!
Wow, its amazing though - I love the paint.
So I have Sat and Sun to paint. Working around three mini people under the age of 6 is hard-work. A big job like paint and having to paint within half an hour of the primer means I cant be at the call of our minis. So I only have the weekend to paint! Our day started with the whole morning of painting being a write off, due to a broken down car.......not a great start.
With car fixed (fingers crossed) I got to work on the caravan!
I was told by where we brought the paint from that I only needed one tin....Yes I questioned that but was told only one tin. Now I was a bit mean on their twitter. After a hugely stressful day to run out of paint, after doing such a small amount was so upsetting! Also that small amount needs a second coat....

So the rest of the early evening was a right off! Now its Sunday and I have no paint....A whole day which I would have got finished and no paint. This means another week at least of the awning rail off....and no trip away next weekend....Gutted, such a waste.

You can see why am excited, a layer of paint (even needing another coat) and wow it really is a lovely paint!

So not to waste my Sunday, I got some paint for the little strip.

Just this small amount of green, made a big impact!

Her colours have changed so much, due to problems with fabric and finding the most amazing 1970's fabric!! She has gone, from orange and blue to GREEN!
I was worried about if I would like this....

But the green 1960/70's wall paper I found was so perfect, I kept on going with the green....

I LOVE IT!!
So back on the phone to Rawlins on Monday morning, spoke to a helpful guy called Mike. I have now worked out the square meter of each section I have to paint. This means I have now ordered the correct amount of paint!! I've started in this paint, so am going to finish the job!
The paint has arrived!!!
Now, ordering paint online is a little hard. I looked on three different screens at the same colours and they looked different on each screen!! It came down to a guess and a gut feeling!So Friday, it rained....I really worried if I would be able to paint......

But yay, wake up to beautiful sunshine on Saturday! So first things first is a second coat on the roof! Then a coat on, her bottom!

Just with the top and bottom painted she looked so different!!
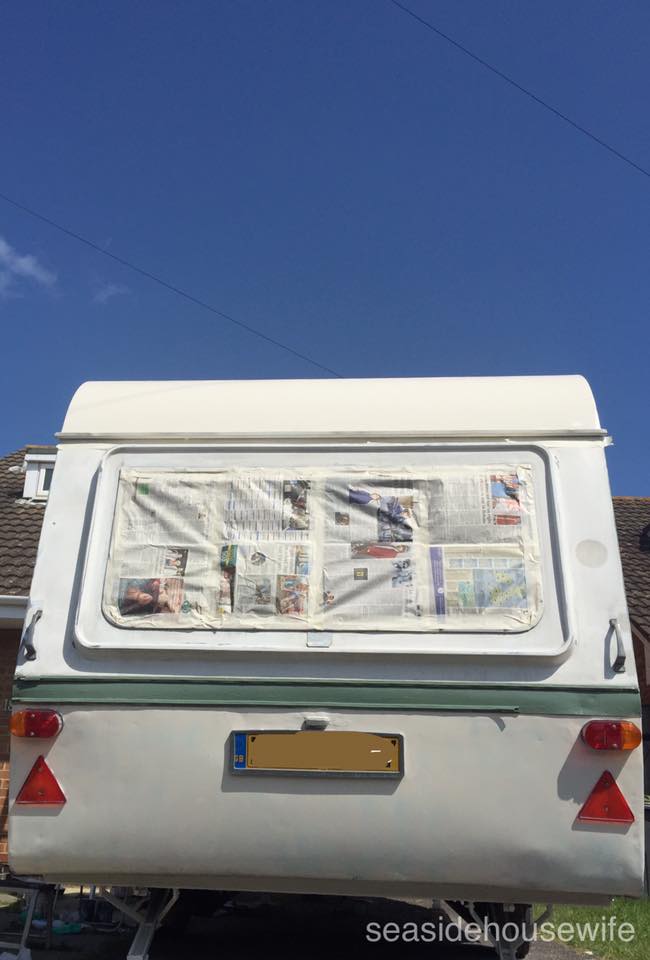
Yes there are still some dents, but am not worried, she looks so much better already. Am never going to make her look brand new and why would I want too! So its Saturday night here, and tomorrow fingers crossed I will be painting the second coat (she made need a 3rd at some point but am going with 2 and done!)
Check back to see what colour I picked!!!
Green, green, green, lots of green!

Its taking a while to sink in!!

I love her door - I have a little cleaning up of the lines to do.

A few bits of trim to paint and fix on her back end.

I had hoped to get her painted in time to start on the awning rail, but that will have to be next weekend!

Am really impressed with the filler!! There are still a few dents, but she is almost 50!

She is almost finished!!!

I have loved this paint and the finish is good, I was never going to get her looking show room finished but I think am pretty close!

I have to keep reminding my self what she looked like, its a big shock how different she looks!!

The day we brought her home on the top photo. Second photo is just 8wks later (around work and three minis under the age of 5) ready to use for the season. The last photo is all the paint work done, apart from touch ups and almost ready for the 2017 season!!

Click my video on how to paint using CombiColor!
Click here to read all about doing up our Daisy.

Her awning rails are now back on!! Am so proud did them all my self, my hands are covered in blisters from hand screwing in like 65 screws in!! My top tip is have some wet wipes/baby wipes close to hand, to wipe away any sealant. I found that I liked to hand screw them in with a screwdriver, over a power drill. I could feel better if I needed to angle it in slightly or not fully tighten so it held it in place.
I balanced the rail on the open door while I screwed in all the way around. On the other side the rail doesn't hold the awning so its much thinner and lighter. I managed to screw one screw in each end to hold it in place while I worked my way round, so you can do it on your own if you have too. It would be a lot easier with two of you ;) Now, just the last touch ups on the paint work to go and the outside is done! (and to put back her marker lights.)
How lovely is this comment! Made my day to hear am inspiring others!
'Alice, you are an inspiration to all us ladies, never thought I would use power tools but reading your blog gave me the confidence to try, lol I did have to get some instructions on how to change the drill bit to a screwdriver bit from the OH , and he has done loads of the bits I couldn't do , so between us it's getting there '
Click my video on how to paint using CombiColor!
Click here to read all about doing up our Daisy.
Nice to see the revival of a old classic
ReplyDeleteThank you, I really hope I do her proud!
DeleteWell done!
ReplyDeleteThank you!! :)
Delete